Wednesday, September 30, 2009

Harvest Season


     Harvest seasons means many things to many people. To the farmers it means harvesting all their crops and preparing their fields before the first frost hits. For my husband it means pumpkin, sweet potato or apple pies. For me, it's canning and preserving season and for you, the grocery stores and farm stands it means great savings. This is actually the second harvest of the season and my favorite by far. The markets are flooded with apples, squash of all shapes and sizes, pears, and pumpkins. The fall harvest is roughly from September to November and it's the perfect time to get the above as well as broccoli, Brussel's sprouts, cauliflower,    cranberries, grapes, pomegranates, potatoes and turnips to name a few. What even better about most of these fruits and veggies is that they are easily kept through the winter months if you know how to store them properly. 
Keep the following in a root cellar where the humidity stays moist and the temp stays cool. If you don't have a root cellar there are other options such as the produce drawers in your fridge. Just make sure they control the humidity. If you have a basement, the stairwell to the outside makes a good root cellar as well.
     Apples: keep them in a plastic and they will last at least 4 months or better.
     Cabbage will keep for 2-4 months
     Carrots will keep for 6 months
     Cauliflower will keep just about 2 months
     Pears will keep for 2 to 4 months
     Potatoes will keep for upto 6 months

  
Onions, pumpkins, and squash require temps of around 50 degree and like it dryer then the above. While you cans till keep them in your basement, try setting them on shelves on the inside of a basement.

Of course if you have a furance that "dumps" excess heat or a finished, heated basement, this might not be the best place to store your harvest.

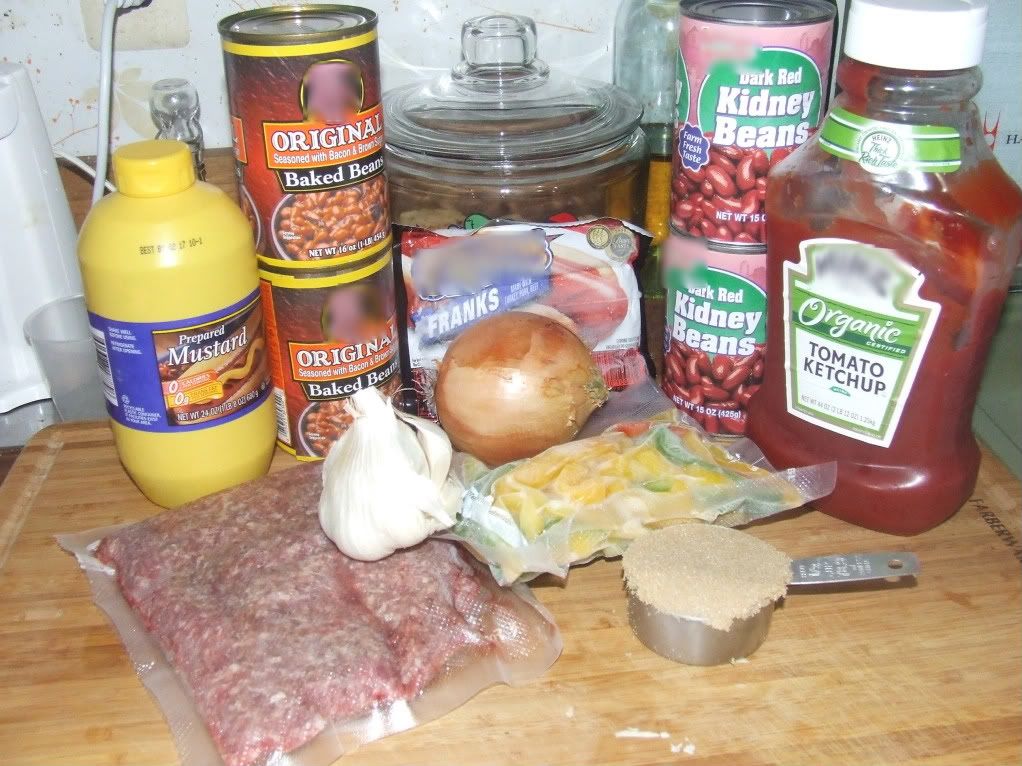
There are several was of preserving fruits and veggies if you don't want to store them. Jams and jellys are a great way to use up excess fruit. Applesauce is the best when you make it yourself but it can be time consuming. Just about everything can be frozen and will last upto a year if done properly and sealed properly. My pantry is filled with canned pears and peaches from two years ago. This year I replenished my green beans and will making applesauce soon. I try and only do 2, sometimes 3 things a season which makes it easier to manage and I don't have to worry about jars being shoved to the back of shelves and forgotten.

If you plan on canning and/or freezing it can be a big investment up front depending on what you want to preserve. I recommend buying the Ball Blue Book or Ball Complete Book of Home Preserving. You'll also need a water bath canner but if you a large wide pot that will hold several quart canning jars then you can skip it. You'll also want a set of tongs that were created for lifting hot jars from the boiling water. That's all you need to get started preserving a number of things. If you want to tackle low acid foods then a pressure canner is required and they tend to be very expensive.

Just one last quick tip. To discourage smaller pests, such as insects, sprinkle bay leaves on your shelves in your storage areas.

*Some of the information in the above post was taken from "The Big Book of Preserving the Harvest" by Carol W Costenbader


H A P P Y  C O O K I N G !!

Monday, September 28, 2009

French Style Stew

Words can not explain just how good this dish truly is but I'll try. This hearty stew is to die for. It is a little work but everything goes together quickly. It's has a very rich stock and is incredibly flavorful. The best part is if you make it in a dutch oven, it's a true one pot meal!

Ingredients:


2lbs stew meat or a chuck roast cut into big chunks
2 celery stalks
2 carrots
1 large onion
3-4 cloves of garlic, crushed
2-3 bay leaves
1 tsp thyme
1 c wine
2 c beef stock
1 14oz can diced tomatoes
1 4oz can mushrooms or a small container of fresh mushroom, sliced
salt and pepper

Directions:

In a large dutch oven, heat a few tbs of veg oil over med high heat. Season the meat with salt and pepper then brown the meat on each side, working in batches. Do not over crowd the pan otherwise the meat won't brown. While the meat is cooking, chopped the carrots and celery into decent size pieces. Nothing has to be perfect, this is a peasant dish and is supposed to be rustic. Cut the onion into large chunks, smash the garlic cloves by taking the side of your knife, placing it over the clove and giving it a whack with the heal of your hand. Remove the skin and give a rough chop if the cloves are still large.


Once all the meat is browned, remove from the pan and set aside. Add a little more oil to the pan if needed and toss in the carrots, celery, onion, garlic and bay leaves. Season with salt and pepper. Cook for a few mins or until they start to soften and pick up some color.
Add the beef stock quickly, scrapping the bits off the bottom of the pan. Then add in the wine, tomatoes, thyme, and mushrooms. Turn the heat to high and bring to a boil. Cover with the lid and put into a preheated 300 degree oven and cook for about 2 1/2 hours.
Serve over egg noodles or I make large drop biscuits and serve the stew over them.

H A P P Y  C O O K I N G !!


Friday, September 25, 2009

Buffalo Chicken Pasta

Kinda spicy, kinda creamy, totally different! Chicken seasoned and grilled then simmered in a spicy buffalo wing sauce plus a mac and cheese that your momma would never have thought to make! This meal is quick and easy, yet very very impressive and perfect for a dinner party. This serves 4 but is easily doubled.


Ingredients:
Spice Rub:
    1tbs paprika
    1 tsp chili powder
    1 tsp ancho or cayenne pepper
    1 tbs ground cumin
    1 tsp celery salt
Sauce:
    2 tbs butter
    2 tbs veg oil
    4 tbs flour
    2 c milk
    1/3 c blue cheese, plus more for garnish
1lbs chicken tenders or breasts cut into strips
1/2 c your favorite hot sauce or buffalo wing sauce
2 tbs salt
1 lb box rigatoni pasta

Directions:
Bing a large pot of water to a boil. Add in the salt and pasta and cook till al dente.
Meanwhile, mix the spices together and rub into the chicken pieces. You won't need all the spice rub, so save the rest for another time. Grill or saute quickly on both sides. In a small sauce pan heat the hot sauce and add in the chicken. Cook over medium until the chicken is cooked though, about 5 mins.
Once the pasta is cooked, leave it in a colander while you prepare the sauce in the pasta pot. Melt the butter and oil together over medium heat. Whisk in the flour and let cook for a min or two, then while whisking, quickly pour in the milk, making sure to get all the flour whisked in. Turn the heat to high and bring to a boil, stirring occasionally so it doesn't burn. Once it boils, reduce heat back to medium and add in the blue cheese. When it has almost completely melted, stir in the pasta.
To serve, divide the pasta among four plates. Top each with a few pieces of chicken the drizzle some of the hot sauce over the top. Finish it with some blue cheese crumbles on top. Serve with a tossed salad and some hard bread!


H A P P Y  C O O K I N G !!

Thursday, September 24, 2009

Tip of the Day: Pasta Pasta Pasta!!!

Alfabeto: letter shapped pasta, generally used in soup


Acini Di Pepe: Peppercorn shapped pasta, generally used in soup


Anelli: ring shaped pasta, used for soups and salads


Angel Hair: thinest of all pasta, long, fine, round strands.


Bucatini: looks like spaghetti however it is hollow and is thicker then spaghetti.


Capellini: is often confused for angel hair, however it is slightly thicker.


Cavatelli: short shaped pasta that resembles hot dog buns, used in thick chunky sacues


Cocciolette, Conchigliette and Conchiglioni: refers to the different sized shell shapped pasta. The smaller ones are great for salads, mac and cheese or chuncy sauces. The jumbo shells are used primarily for making the dish known as stuffed shells.


Couscous: yes it really is a pasta. It's made by rolling moistened semolina wheat and then coating the granules in a finely ground wheat flour. It's usually served under stews or as a side dish.


Ditalini: "little thimbles" are tiny, shot cut tubes and is what you find is Pasta E Fagioli and minestrone soups


Farfalle: bowtie shaped pasta is great in salads, casseroles and sauces.


Fettuccine: long, flat cut pasta, great for thinner sauces such as alfredo


Fusilli: longer cork-screw shapped pasta used in salads and sauces, espeically cheese sauces.


Galletti: "cocks' combs" are simicircular, tube shaped pasta with a ruffled edge.


Gemelli: meaning twins is two short strands of pasta twisted together, because of this they retain and al dente texture making them versatile. 


Gnocchi: is a dumpling made of flour and potatoes that are then boiled or baked and served with butter and grated parmesan cheese.


Lasagne: Long, flat and wide used for making Lasagna


Linguine (Linguini): flattened spaghetti, that is narrower then fettuccine


Macaroni: Hollow, elbow shaped pasta, commonly used in salad and sauces


Manicotti: large tube shaped pasta that is about 4 inches long and 1 inch in diameter


Mostaccioli: Similar to penne, it's 2 inches long and cut on the diagonal.


Orecchieette: "ear" shaped pasta used in salads and sauces


Orzo: rice shaped pasta, used with thin sauces or soups


Penne: tubular, slanted cut pasta used in several dishes


Penne Rigate: penne pasta with ridges


Ravioli: filled square shaped pasta of different sizes


Rigatoni: hollow tube shaped pasta with ridges that are straight cut


Rotini: another spiral shaped pasta and is shorter then fusilli


Ruote: wagon wheel shaped pasta used in soups


Spaghetti: medium diameter, long cut pasta


Stellette: tiny start shaped pasta used in soups


Tagliati: spaghetti cut into smaller pices for soups


Tagliatelle: classic egg noodle that is thin long and flat


Tortellini: "belly button" shaped filled pasta


Vermicelli: thinner then spaghetti but thicker then angel hair, means little worms and is used just like spaghetti. Can also be referring to angel hair "nests"


Ziti: long cut, tubular, hollow pasta used for making Ziti


H A P P Y  C O O K I N G !!

Wednesday, September 23, 2009

Eggplant Parmesean

I love Eggplant! You can do so many things with it but I think I love eggplant parm the best. Eggplant is in season right now (normally from June to October) and it's the only time of year that I will buy it because it can be a little expensive otherwise. I like using both the dark purple kind that you find readily in the store and also the white variety from which eggplant got it's name. If you've never tried a white eggplant I suggest you do. They are less bitter, and have a creamier texture even though they contain more seeds. Most people will tell you that their skin in tougher and to peel it before hand but I don't find this to be true. There is a very important step in preparing the eggplant that most people miss, because of the fact that eggplant has a tendency to absorb a lot of oil when it's cooked, it's very important not to skip the salting step listed below.  Another great tip is that after you've breaded and fried them, you can freeze them. Store them in an airtight container with waxed or parchment paper in between. Then you can make eggplant parm all year round.

Ingredients:

2 medium sized eggplant
2 eggs, beaten with 2 tbs milk or water
1 c seasoned  breadcrumbs
1 jar of your favorite pasta sauce
16oz bag of mozzerella cheese
oil for frying

Directions:

Slice the eggplant about 1/4 inch thick. Layer the eggplant in a colander. In between each layer sprinkle the pieces with a good pinch of salt. Let the eggplant sit for at least an hour. After the hour is up, rinse the eggplant well and dry the slices.

Dip each slice into the egg wash then cover with breadcrumbs, pushing down to get them well coated. Fry each slice until golden brown on both sides. Drain well on paper towels. Do not layer the eggplant more then 1 high while draining to prevent them from absorbed extra oil.
In a 13x9 baking dish spread 1/3 of a jar of tomato sauce on the bottom. Play a layer of fried eggpalnt, half the cheese and another 1/3 jar of sauce. If there is enough to build a second layer, do so, only this time it should be eggplant, sauce then cheese. You do not want to go more then two layers high.
Bake in a preheated 350 degree oven for 30-45 mins or until the cheese is melted and bubbly. Serve with a side of spagetti and a tossed salad.


H A P P Y  C O O K I N G !!

Tuesday, September 22, 2009

Tandoori Chicken with Herbed Yogurt Sauce

Tandoori actually means to be cooked in a tandoor which is a round, typically clay oven that is heated over wood or charcoal and is used in India for baking bread or roasting meats. In this case tandoori is referring to a blend of spices that give chicken or a fish an authentic flavor. It works well with high heat too so it's perfect for using on the grill.


Ingredients:
2 tbs each of the following: onion powder, garlic powder, ginger, and corriander
1 tbs each of the following: cumin, cayenne, tumeric, white pepper and salt
3 lbs chicken breast
3 tbs veg oil
4 pita breads, warmed on the grill

Directions:
Heat grill to med high. Combine all the spices and oil in a bowl to make a paste. Use more oil if needed. Smear one side of each of the chicken breasts with the paste. Grill 3-4 mins on each side or until slight charred and cooked through. Remove and let rest for 5 mins. Cut lengthwise into 1/2 inch pieces. Serve open faced on a pita with the yogurt and Cucumber Salad


Herbed Yogurt
1 c greek yogurt
1/4 c chopped mint
1/4 c chopped cilantro
Place all ingredients in food processor and process till smooth.


H A P P Y  C O O K I N G !!

Monday, September 21, 2009

Hoisin Chicken

Hoisin sauce is a thick, slightly sweet, slightly spicy sauce used in Asian cooking and is one of the key ingredients to Peking Duck. It's made from fermented soy beans with the addition of garlic, vinegar, and chili peppers but you will often find other spices in it. It's traditionally used as a dipping sauce but there are many recipes out there that use it as a marinade or right in a dish. 


Ingredients:


3/4 c Hoisin Sauce
3 scallions
3 cloves garlic, minced
2 inch piece of ginger, minced
Juice and zest of two limes
2 tbs rice vinegar
2 lbs skin on chicken thighs and drumsticks


Directions:


Preheat grill. Combine the sauce, garlic, ginger, lime zest and juice, and the vinegar in a small bowl and whisk to combine well.  
Once the grill is hot, season the chicken with salt and pepper and toss into the sauce. Place on the grill skin side down over high heat until the skin is crisp. About 5 mins.
Reduce heat and cook the chicken till done, 15-20mins, basting with the sauce often. When done remove to platter and sprinkle with the scallions. Serve with Cucumber Salad  and "Faked" Fried Rice  


H A P P Y  C O O K I N G !!

"Faked" Fried Rice

Traditionally fried rice is made using a high temp oil, day old rice and various extra's such as peas, pork, scallions, onion and egg. This "faked" version cuts out almost all the oil but still has plenty of flavor.

Ingredients:

1tbs veg oil
1 clove garlic, minced
1 tbs fresh minced ginger or about 1/2 tsp powdered
1/2 bunch scallions, chopped, greens included
1 1/2 tbs soy sauce
1/2 c peas
2 c long grain rice
4 c veggie stock
Optional:
small onion, diced
1 egg, quickly scrambled

Directions:
In a large sauce pan, over high heat cooked the rice, garlic, and ginger; in the veg oil stirring frequently until toasted but not browned. Add in the pea and onion if using and give another stir to mix them in. Add in the stock then the soy sauce. Bring to a boil then reduce to a simmer. Cover and let cook for 15 mins or until all the liquid is absorbed. Stir in the scrambled egg if using and the scallions.

H A P P Y  C O O K I N G !!

Cucumber Salad

Tangy and sweet plus easy to make. Its a great side for a summer picnic because it doesn't have any mayo in it. I love serving it with grilled chicken or bbq ribs. It's easily adaptable to become an Asian side as well by using rice wine vinegar and adding in a sprinkle of toasted sesame seeds.

Ingredients:
2 large cucumbers, very thinly sliced
1 med onion, very thinly sliced
1/2 c apple cider vinegar (use rice wine for an asian take, can also regular vinegar)
1tbs oil
2 tbs sugar
a pinch of salt

Directions:
I liked using a mandolin to slice my cucumbers but a box grater works very well too.
Whisk together the vinegar, sugar, salt and oil. Pour over the cucumbers and onion. Toss well. Refrigerate until using.

H A P P Y  C O O K I N G !!

Wednesday, September 16, 2009

Rancho Beans

It's another chilly day here in Pennsylvania, not even 60 outside, which means it's slow cooker day! I love, love, love, using my slow cooker. I don't have to worry about preparing a meal at the end of the day and I know whatever I throw in there will be hot, juicy and delicious! Rancho beans is like chili, only not, which makes it one of my husbands favorite meals because it's not spicy at all. This recipe came from a woman who I bought an old fashion bean pot from. I've made some changes to it along the way to suit my family, plus it takes only minutes to make.

Rancho Beans

Ingredients:
Original recipe:
2 green peppers chopped
3-4 cloves garlic, minced
Photobucket1 med onion, chopped
1lb ground beef
1 c ketchup
2 1lb cans of your favorite pork and beans or baked beans
1/2c brown sugar
2tbs mustard
1lb can red kidney beans
What I add:
1 pkg of all beef hotdogs
another 1lb can of red kidney beans
and sometimes I'll add in a splash of apple cider vinegar

Directions:
If you start this in the morning then don't worry about cooking the beef first. Just put everything in the slow cooker and stir it to combine. Put it on high and let it cook.
I often don't get around to it till the afternoon so I brown the meat along with the onions, peppers, and garlic. Then add it and the rest of the ingredients to the slow cooker, stirring to combine. Set it to high and let it go.

Don't worry if it looks dry. As it cooks it liquid in the veggies will be released and it will create a sauce. Hubby likes to eat it with some saltines crumbled into it and I enjoy it with a slice of bread.


H A P P Y   C O O K I N G !!

Tuesday, September 15, 2009

Seasoning Blends

Making your own blends of herbs and spices is a great way to control salt content, not to mention those longs words you can't pronounce that companies use to enhance flavors, prolong shelf life, and use as anti-caking agents. So here is a nice list to get you started. It includes taco seasonings, chili powder and even a Faux Old Bay seasoning! Depending on the size of the batch that I make, I will either store them in pint sized canning jars or baby food jars. Unless other stated just stir the ingredients together and place in a labeled airtight container.


Apple Pie Spice

8 parts ground cinnamon
4 parts ground nutmeg
2 parts ground allspice
1 part ground cloves or ginger

BBQ Rub 1

6 tbsp brown sugar, tightly packed
2 tbsp Kosher salt
1 tbsp chili powder
1/2 tsp ground black pepper
1/2 tsp cayenne pepper (optional)
1/2 tsp thyme
1/2 tsp onion powder
1/2 tsp garlic powder

BBQ Rub 2

2 tablespoons salt
2 tablespoons sugar
2 tablespoons brown sugar
2 tablespoons ground cumin
2 tablespoons chili powder
2 tablespoons freshly ground black pepper
1 tablespoon cayenne pepper
1/4 cup paprika

Blackened Seasoning

3/4 c paprika
1/2 c salt
1/4 c garlic powder
1/4 c onion powder
1 to 2 tbs ground cayenne pepper
1/2 c black pepper
2 tbs leaf thyme
2 tbs leaf oregano

Cajun seasoning

1 cup salt
1 cup garlic powder
1 cup onion powder
1/2 cup dried oregano leaves
1/2 cup dried sweet basil
1/4 cup dried thyme leaves
1/4 cup black pepper
1/4 cup white pepper
1/4 cup cayenne pepper
1 1/4 cups paprika

Chili Powder (best method)

4 large dried mild chili peppers
2 medium dried hot chili peppers
4 teaspoons cumin seeds
1/2 teaspoon whole cloves
1 teaspoon coriander seeds
1/2 teaspoon whole allspice
1/4 cup oregano
2 tablespoons garlic powder
1 tablespoon salt
1/2 teaspoon sugar
Remove stems and seeds from peppers. Cut peppers into small pieces. Place in a heavy skillet. Add cumin, cloves, coriander, and allspice. Over low heat,
stirring constantly, cook until mixture begins to crackle and gives off the aroma of the peppers. Cool to room temperature.
Place pepper mixture in blender. Add oregano, garlic powder, salt, and sugar; blend to a find powder. Spoon into a screw-top jar.

Chili Powder (easy)

2 tbsp cumin
1 tbsp cayenne pepper
2 tbsp garlic powder
1 tsp allspice
1 tsp clove
1 tsp oregano

Chili Mix

1 tbs Unbleached Flour
2 tbs Instant Minced Onion
1 1/2 tsp Chili Powder
1 tsp Seasoned Salt
1/2 tsp Crushed Dried Red Pepper
1/2 tsp Garlic
1/2 tsp Sugar
1/2 tsp Ground Cumin
Spoon mixture onto a 6" square of aluminum foil and fold to make an airtight packet.
Label with date and contents. Store in a cool, dry place. Use within 6 months. This is equal to the seasoning you would purchase in packages in the store.

Essence Seasoning

2 1/2 tbs paprika
2 tbs salt
2 tbs garlic powder
1 tbs black pepper
2 tbs onion powder
1 tbs cayenne
1 tbs dried oregano
1 tbs dried thyme

Fajita Seasoning

1 1/2 tsp ground cumin
1/2 tsp oregano
1/4 tsp salt
1/4 tsp cayenne
1/4 tsp black pepper
1/8 tsp garlic powder
1/8 tsp onion powder
Spoon mixture onto a 6" square of aluminum foil and fold to make an airtight packet.
Label with date and contents. Store in a cool, dry place. Use within 6 months. This makes enough for 1lb chicken or steak and is equal to the seasoning you would purchase in packages in the store.

Garam Masala Spice

2 tsp Ginger
1 tsp Cinnamon
2 tsp Black pepper
3 tsp Ground cumin
3 tsp Ground coriander
1/2 tsp Ground nutmeg
1 tsp Ground cloves

Italian Seasoning

1/3 cup oregano
1/3 cup basil
2 tbsp rosemary
1/4 cup thyme
1/4 cup sage
1/4 cup marjoram

Lemon Pepper

1 cup ground black pepper
1/3 cup dried lemon peel
3 tbs coriander seeds
1/4 cup dried minced onion
1/4 cup dried thyme leaves

Montreal Steak Seasoning

4 tbs salt
1 tbs black pepper
1 tbs onion flakes
1/2 tbs garlic
1/2 tbs crushed red pepper
1/2 tbs thyme
1/2 tbs rosemary

Onion Soup Mix

3/4 cup instant minced onion
1/3 cup beef flavored instant bouillon
4 tsp onion powder
1/4 tsp celery seed, crushed
1/4 tsp sugar

Old bay

1 tbs ground bay leaves
2-1/2 tsp celery salt
1-1/2 tsp dry mustard
1 tsp ground black pepper
1/2 tsp ground white pepper
1/2 tsp ground nutmeg
1/2 tsp ground cloves
1/4 tsp ground allspice
1/2 tsp ground ginger
1 tsp paprika
1/4 tsp crushed red pepper flakes
1/4 tsp ground mace
1/4 tsp ground cardamom
1/2 tbs fennel

Poultry seasoning

1 1/2 tsp sage
1/2 tsp thyme
1/2 tsp marjoram
1/4 tsp black pepper

Pumpkin Pie Spice

1/2 tsp ground cinnamon
1/4 tsp ground ginger
1/8 tsp ground nutmeg
1/8 tsp ground allspice


Season salt

6 tbs salt
1/2 tsp thyme leaves
1/2 tsp marjoram
1/2 tsp garlic salt or garlic powder
2 1/4 tsp paprika
1/4 tsp curry powder
1 tsp dry mustard
1/4 tsp onion powder
1/8 tsp dill weed
1/2 tsp celery salt

Shake and Bake

4 cups flour
4 cups cracker meal or ground crackers
4 tbs salt
2 tbs sugar
2 tsp garlic powder
2 tsp onion powder
3 tbs paprika
(store in fridge)

Sloppy Joe Seasoning Mix

1 tbs dried onions
1 tsp bell peppers, freeze-dried
1 tsp salt -- or to taste
1 tsp cornstarch
1/2 tsp dried minced garlic
1/4 tsp dry mustard
1/4 tsp celery seed
1/4 tsp chili powder
Combine all ingredients in a small bowl until evenly distributed.
Spoon mixture onto a 6" square of aluminum foil and fold to make an airtight packet.
Label with date and contents. Store in a cool, dry place. Use within 6 months. This is equal to the seasoning you would purchase in packages in the store. When making sloppy joes, combine spice packet with 6oz can tomato paste and 1 1/4 c water.

Taco Seasoning Mix

1 tbs minced onion (dried)
1 tsp salt
1 tsp chili powder
1/2 tsp cornstarch
1 tsp ground cumin
1/2 tsp instant minced garlic
1/2 tsp crushed red pepper
1/4 tsp oregano
Spoon mixture onto a 6-inch square of aluminum foil and fold to make airtight, label and store in a cool, dry place. Use within 6 months. Makes 1 package and is equal to the seasoning you would purchase in packages in the store..
To make taco filling, brown 1 pound ground beef in a skillet over medium-high heat. Drain excess grease. Add 1/2 cup water and 1 package Taco Seasoning Mix. Reduce heat and simmer for 10 minutes, stirring occasionally.


Tip of the Day: Emergency Substitutions

I've scoured the net the and found two great website to reference for emergency substitutions. These are an invaluable resource when you start making something and realize "oh crap! I'm out of......."

Emergency Site One

Emergency Site Two

Monday, September 14, 2009

Tip of the Day: Baking Soda, Baking Powder and Salt


What is Baking Soda?
            In simple terms baking soda is sodium bicarbonate, a compound that when mixed with an acid release carbon dioxide gas. This process is what makes baked goods rise.


What is Baking Powder?
            Baking Powder is actually baking soda mixed with cream of tartar and a drying agent. The cream of tartar is the acid that mixes with the soda when added to a liquid that produces the carbon dioxide gas. The drying agent is added in to prevent this reaction from happening in the container.
            A double acting powder just means that there are two acids, one that reacts at room temp and another that reacts at higher temps (120 degrees and higher).  This makes it helpful in longer baking times.
            Keep in mind that baking powder deteriorates rather quickly, especially after opening as moisture gets in which starts releasing carbon dioxide.
                You CAN NOT use baking soda to replace the baking powder in a recipe; however you CAN use baking powder to replace baking soda.   If you are out of baking powder you can mix two parts cream of tartar to one part baking soda.

Why do some recipes call for soda and others call for powder?
                Since baking powder contains both a base and an acid it provides a neutral taste. You will see it in recipes where the liquid is neutral too such as milk.
                Baking soda is a base and has a bitter taste. It requires the addition of an acid such as buttermilk, yogurt or vinegar, to balance it out.

Onto Salt!
                In bread making, salt reacts with the yeast and effects taste, texture, and crust color. In other baked goods salt is used to enhance the flavor of the finished product much like vanilla or MSG, without tasting the salt itself. 

Saturday, September 12, 2009

Tip of the Day: Perfect Pie Crust

Pie crust recipes are a dime a dozen. They come in all shapes, sizes and taste from flakey to crumb to Oreo cookie. The perfect pie starts with the perfect crust. To achieve pie nirvana, keep a few things in mind when making a normal pie crust.
Rule 1: Look for recipes with both butter and shortening. Butter lends flavor while shortening makes it flaky. Using an all butter recipe is fine as long as it has some sort of acid in it. (see rule 2). Never make a pie crust with all shortening. Yuck!
Rule 2: Find a recipe that uses some sort of acid, especially if you use an all butter recipe. Lemon juice and apple cider vinegar are most common.
Rule 3: Make sure the butter/shortening and water are ICE cold.
Rule 4: Use your hands or a food processor. Your hands work the best to smush the butter and flour together but a food processor is the next best thing. Just pulse a few seconds at a time until a nice crumbly mixture is formed. The key is to coat the flour with butter and not the butter with flour.
Rule 5: Sprinkle in your water 1 tbs at a time. You almost never use the entire amount the recipe calls for. Keep adding water just until the dough sticks together.
Rule 6: DO NOT OVER WORK THE DOUGH! Even if you have the perfect recipe you can ruin it by overworking the dough. Once it all comes together, stop! Flatten it into a disk, wrap it in plastic wrap and chill in the fridge for 1 hour. This gives the gluten in the flour a rest while firming up the butter again. Having a cold crust going into the oven is what helps to keep the nice fluting you spend your time creating. If the butter is warm, it melts in the oven before it can cook enough to hold its shape.
Rule 7: When you’re doing a top crust, brush with an egg wash (1 egg beaten with 1 tbs milk). This gives you a nice shiny, golden crust.


Thursday, September 10, 2009

Spanish Pork Roast and Rice with Acorn Squash

Last spring my husband and I decided that we were going to buy half a pig. We live in farm country so getting really fresh meats is easy to accomplish. We called up the local pig farmer and for roughly a dollar a pound we received everything from spare ribs to ham hocks; sausage to freshly smoked hams and the best bacon you’ve ever tasted. I had quite a few roasts and was getting a little sick and tired of cooking in the slow cooker with sauerkraut so I went on the search for recipes. I found a number of good ones but everything seemed so involved. Finally I just adapted a couple of them so that the prep was quick, even though the cook time was long. I hope you enjoy it as much as we did. This has a few smaller recipes that go together to make the dish and each recipe will be posted separately.


Spanish Pork and Rice with Acorn Squash


PhotobucketPork Roast Ingredients:


¼ cup Sofrito
12 whole garlic cloves
3 envelopes of sazon seasoning
(found in the Mexican isle)
1 tbs adobo seasoning
4-5lb pork shoulder roast

Preheat oven to 300. Cut a 2 inch slice off your pork roast only if you are making the rice that goes with this dish. Make 12 slits in the top of your pork roast and place a clove of garlic in each slit.
Mix together the sofrito, sazon and adobo seasonings. Rub this over your pork roast.
Photobucket
Photobucket

Place pork in a roasting pan, cover with foil and place in the oven to cook for 3 hours. Remove foil, turn oven to 400 and let cook another 30mins or until the pork forms a crispy crust. Serve this with Acorn Squash
and Spanish Rice


Photobucket


Sofrito

Sofrito
1 lrg green pepper
1 onion
1 small bunch of cilantro or ½ a lrg bunch
2 cloves of garlic
¼ c olive oil
Place all ingredients except olive oil into a food processor and turn on. While it’s running, slowly drizzle in the olive oil. It’s ready when a paste is formed. This can be kept in the fridge for up to 10 days OR you can put what left into an ice cube tray and freeze it. Once it’s frozen pop them out, put into a freezer bag and save for when you need it.
Everyone has their own sofrito recipe so feel free to use your own.

Spanish Rice

Spanish Rice

Ingredients:

Photobucket2in slice of saved pork, diced
¼ c diced onion
2 tbs butter
2 envelopes sazon
1 tbs adobo
2 c long grain rice
4 c water or veggie stock
2 tbs sofrito

In a med sized pot, sauté pork and onion in butter over high heat. Add the rest of ingredients except water and stir until the rice is coated. Add in the water or stock and bring to boil. Boil for 5 mins, reduce heat to low, cover and let cook for 15 mins.

Acorn Squash

Acorn squash
Photobucket

1 squash per 2 people
2 tbs butter per squash
2 tbs brown sugar per squash
1tsp cinnamon per squash


Slice each acorn squash in half and remove seeds. In each half place 1 tbs butter, 1 tbs brown sugar and ½ tsp cinnamon. Bake at 350 for at least an hour, longer for bigger squash. If you’re making this with the Spanish pork put in the oven during the last 90mins of cooking.

 
HostGator Promotion Code
x

Get Our Latest Posts Via Email - It's Free

Enter your email address:

Delivered by FeedBurner